Did you know that your smartphone has an in-built magnetometer to power its compass?
The earth’s magnetic field is big but not particularly strong, and that means that the magnetometer in your phone is sensitive enough to detect small ferrous metal objects such as a coin, a large nail or a piece of cutlery which also generate small magnetic fields of their own. In other words YOU DONT HAVE TO GO AND BUY A METAL DETECTOR, you’ve ALREADY GOT ONE INSIDE YOUR PHONE! We just have to unlock its potential.
Do you want to try a bit of hacking?
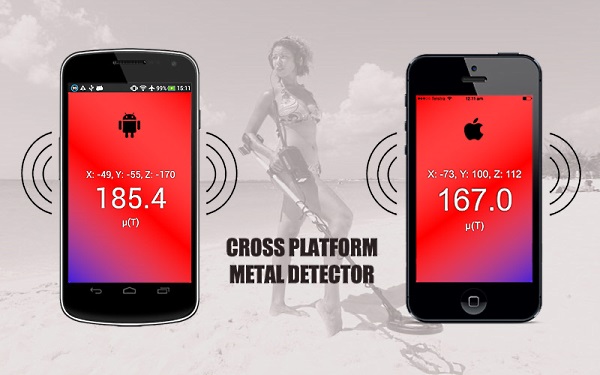
In this post, I’m going to show you how you can build your own cross-platform metal detector app for BOTH iPhone and Android phones, this app will interface with the magnetometer hardware in your phone and notify you of any ferrous metal or magnetic objects nearby.

This should take from 30 mins to 2 hrs of your time for either platform and depending on the speed of your internet connection, perhaps longer if you have bad luck and something doesn’t work straight away.
Introducing Cordova (or PhoneGap, for Adobe fans)

The Apache Cordova project is an open source initiative aimed at bundling a HTML page (ie `index.html` – such as the one below) into a native app that will work across just about every smartphone device. This is great news because it means that with you only need to code your app once and it works on multiple devices!
# index.html
<html>
<head><title>My First App</title></head>
<body>
<button onclick=”alert(‘World’)”>Hello</button>
</body>
</html>
PhoneGap is the same thing, but with a snazzier name trademarked by Adobe (the Photoshop people) and with an online service that gives you a wizard-like interface for building apps so you dont have to deal with obscure command line errors, but then you have to pay Adobe for the favour.

So what does this ‘Cordova’ thingy do for me?
Using Cordova means that you don’t have to know how to setup a mobile app project because its all done for you! Cordova will basically generate all the folders and files you need to get started with a basic HTML ‘Hello World’ app for each platform.
Cordova also has a powerful ‘plugin’ framework that allows access to the phone’s hardware, in this post we will be downloading 2 different plugins to unlock the Magnetometer and Vibration functionality inside your phone.
To get started with a Cordova app you need to install NodeJS (http://nodejs.org) which is a powerful javascript command line tool that Cordova uses to do most of the donkey-work for setting up your project.
The Code
Go have a look at the following ‘index.html‘ file in Github, it contains all the code you need for a basic magnetometer app:
https://github.com/sdesalas/cordova-magnetometer-app/blob/master/www/index.html
Save it to your computer:
1. Right-click on ‘Raw‘ button
2. Choose ‘Save link as..’ on the context menu
3. Put it somewhere sensible where you can find it
Hey, this is HTML right?
Correct, that means your browser can open it.
Double click to open it on a browser. You should get something like this:

Err.. Why?
Well, your mobile has a magnetometer in it your PC doesn’t. So all you’ll get out of it in a desktop browser is a ZERO reading.
And thats ok, it just means everything is working as expected.
The Android App

What You’ll need:
1. A PC or Mac with NodeJS, Java (JDK7) and Android Studio installed.
2. An Android (4.0+) device and USB cable for testing.
3. Basic understanding of a command line interface (you can navigate between folders).
CORPORATE FIREWALLS: Note that the steps below may not work behind a corporate firewall, you may need extra steps to set up internet access via a corporate proxy.
You’ve already installed NodeJS right? If its a old version (older than 0.11) you might want to download the latest and re-install it.
Ok, next you will need Java JDK 7 installed and Android Studio, these are needed to create a native app for Android. You can get them on the following links:
JDK7: http://www.oracle.com/technetwork/java/javase/downloads/jdk7-downloads-1880260.html -> Remember x86=32bit, x64=64bit
Android Studio: https://developer.android.com/sdk/index.html
BEWARE: after installing/running Android Studio, it will want to dowload the latest Android SDKs (the bits of functionality that enable your PC to talk to the phone hardware), this can take anywhere from 10 minutes and up to a couple of hours over a slow internet connection.
Installing Cordova
We are now going to install Cordova and create an Android project.
Open up a command line window and type :
> npm install -g cordova

Creating the Android Project
Next, navigate to your projects folder and create a new cordova project with android support:
> cordova create magnetometer my.magnetometer magnetometer
> cd magnetometer
> cordova platform add android
 If all goes well, this should have created a bunch of files and folders (ie a project structure) within your ‘magnetometer’ project folder, you should be able to see them using a file explorer:

Copying our Metal Detector Code
The folder ‘www‘ contains our web code. Here is where we’ll be placing the index.html file that we downloaded before.

Building the App
Go back to the command line and run an extra couple of commands to ‘unlock’ the vibration and magnetometer functionality on your phone.
> cordova plugin add cordova-plugin-vibration
> cordova plugin add cordova-plugin-magnetometer

Next we are going to ‘build’ the app, so you can use it on your android phone. We need one more cordova command to ‘prepare’ the app:
> cordova prepare

Then follow these instructions:
1. Open Android Studio
2. On the Welcome Prompt. Select ‘Import Project’
3. Click on the ‘platforms\android’ folder inside your project.
4. Press ‘OK’.
5. Press ‘OK’ again if you get an extra prompt about Gradle settings.
6. Wait for the progress bar to finish.

 This will create an android project, next we will build the APK file that can be used to run the magnetometer app on your phone.
Make sure you’ve waited until all the progress bars are finished before the next steps.
1. Android Studio will need to get all required Java libraries that the project depends on, this usually takes some time. Did you really wait until all progress bars and loading messages were finished?
2. Ok, click on the ‘Play’ button at the top menu as per screen below.
3. This will trigger a build using Gradle. You can see the progress on the ‘Gradle Console’ window.
4. When ready, a popup will appear asking if you want to run the emulator. DO NOT press OK here. It will grind your computer to a halt. Just press ‘Cancel’ on the popup.

Installing the App on your Android Phone
Next we are going to email ourselves the completed app.
1. Navigate to your ‘magnetometer’ project folder using the file explorer.
2. Click ‘platforms’ -> ‘android’ -> ‘build’ -> ‘outputs’ -> ‘apk’
3. Find the file ‘android-debug.apk‘

4. Next. Email it to yourself.
5. Go to your Android phone.
6. Open ‘Settings’ > ‘Security’
7. Turn ON ‘Unknown Sources’ (you can turn it back OFF later)
8. Open your email, click on the attached ‘APK’ file.
9. You should then get an installation screen as per below.

10. Go to your Apps and look for ‘magnetometer’, then open it.
11. READY! Start finding some metal objects!

The iOS App

What You’ll need:
– A newish Mac with NodeJS and XCode installed
– An Apple Developer membership (US$99)
– An iPhone (4.0+) and USB cable for testing.
– Basic understanding of a command line interface (you can navigate between folders).
Installing Cordova
1. Make sure you have NodeJS installed and its at a reasonably new version (0.12+).
2. If you need to update the version of node. Do it following this article.
3. Open a terminal window (Look for the ‘Terminal’ app in Launchpad)
4. Type the following command to install Cordova :
$ sudo npm install -g cordova

5. You’ll be prompted to enter a password for your user account (on the mac).
6. There will probably be some warnings when installing Cordova (“WARN”), you can safely ignore these. If you get any “ERROR”s they are a bit more of a problem and will need attention before continuing. Type the errors into Google for help.
Creating the iOS Project
Once Cordova has been installed, we are going to create the project structure for our magnetometer project. Firstly, navigate to your projects folder. The commands to use are �:
$ cordova create magnetometer my.magnetometer magnetometer
$ cd magnetometer
$ cordova platform add ios
$ cordova plugin add cordova-plugin-vibration
$ cordova plugin add cordova-plugin-magnetometer

Copying our Metal Detector App Code
This should have created your project structure as per following screenshot. Make sure you delete the contents of the ‘www’ folder and replace them with the ‘index.html’ file you downloaded earlier.
 You will then need to run the following command on your ‘magnetometer’ folder to ‘prepare’ the files (it will copy the ‘index.html’ to the XCode build folder).
$ cordova prepare

Building the iOS App
And now we can continue to XCode by finding the file ‘magnetometer.xcodeproj’ inside our project folder (look inside the sub-folder ‘platforms’ and ‘ios’). Just double-click on it and it will open (if you have XCode installed).
 Make sure you are signed in as an apple developer. Joining costs US$99. You cannot drop an app on your iOS device without one of these:
1. Go to ‘XCode’ (on the top menu)
2. Select ‘Preferences…’, then ‘Accounts’
3. Click the plus (+) sign to add an account
4. Enter your Apple Developer email and password

Running the App on your iPhone
Then just go and run the app! This bit is even simpler than for Android!
1. Connect your iPhone to your Mac using the USB cable.
2. Select your iPhone as the device ‘target’ on the top menu
3. Press the ‘Play’ button to run the build.

And VOILA! Now start finding some metal with your iPhone!

And thats IT!
That concludes my post for today, thanks for taking an interest. I hope you didn’t have to bang your head against the keyboard too much to get this working.

Please feel free to write your comments and experiences below.
If you liked it then you are welcome to shout me a beer or help me out by sharing it with your friends and colleagues.
BYE!!!