For the past few months I’ve been trying to get some of my robots to roam around the house with a mind of their own, learning as they go. It turns out that the task is harder than I thought.
The main issue is paralell signal processing.
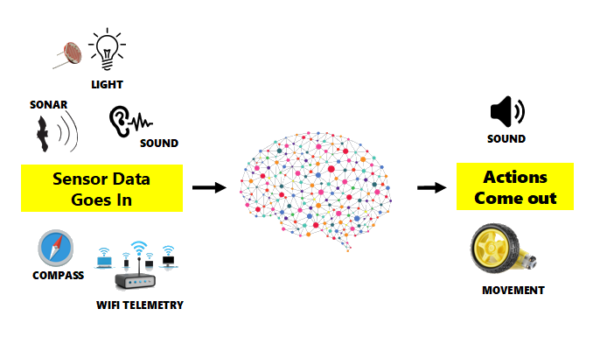
To illustrate: a single robot will have usually 3-5 sensors that collect information on the world around it. I’m particularly interested in ambient light as i want it to be able to recharge its batteries with a mini solar panel if it needs to, but i also have some useful options for collision detection, orientation and WiFi triangulation.
First attempt, enter the matrix
I originally attempted a weighted relational matrix of inputs to outputs. Like a chequers board where each square starts off with one piece that represents the strength of the relationship between an input and an output. To simulate learning, I would stack extra pieces on a square, for example to reinforce past choices, making it more likely to get picked in subsequent iterations. I called the engine fusspot, which I thought was a suitable name given that this algorithm could be trained but in the end, choices were always fuzzy and random.

This worked, in a fashion. I could train the engine by modifying the strength of each relationship, making subsequent choices more likely to be biased by training, but it was a terrible solution when trying to implement it in practice.
The main problem is that this solution does not take context into account, and it turns out context is everything – you can’t rely on a single input channel (such as IR sensor) to determine the choices a robot can make (stop, turn, keep going), it takes a wholistic approach that integrates data from all the sensors at the same time.
Context is everything. You can’t rely on a single input channel, it takes a wholistic approach that integrates data from all the sensors at the same time.
I got to a point where trying to break down the problem further wasn’t getting me anywhere. So I decided to look around and see what other people had done.
Video games and artificial gardening.
By this point I had done a bit of reading on Artificial Neural Networks and decided that this was roughly where I was heading.
This led me into the world of video games. I’ve played plenty of games myself and know that game developers are at the leading edge of AI.
The wikipedia article inspired me to look a bit more into a game called Creatures written by a guy called Steve Grand. Steve dropped off the face of the earth a few years ago through a self-inflicted kickstarter project gone wrong.
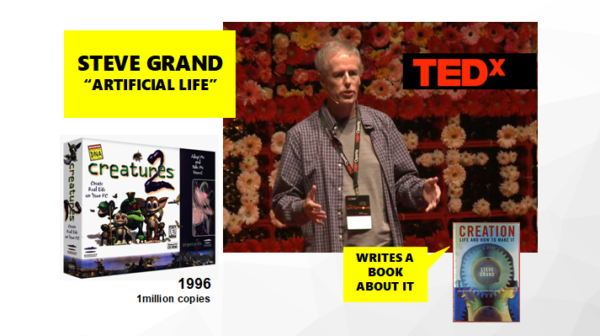
But before he did so, he wrote an excellent book called Creation, Life and how to make it, where he details some of the techniques he used, as well a zen-like philosophical outlook on artificial life powerful enough to blow my socks off and turn upside down all my notions of what AI is and should be about:
All life, both biological and artificial, are series of emergent patterns that persist longer than others, in other words, certain patterns of interaction between components (cells usually, though these are also made of patterns of interaction between cellular components and so on to the atomic level) happen to be more successful in their environment and thus persist through time.
The beauty here is that life is a set of emergent patterns, rather than the components of which its made of, or the behaviour that arises from their interaction. The best humans can strive for is creating the conditions that would allow such patterns to emerge, for example by defining the underlying components and encouraging certain patterns of behaviour over others. Think of it as artificial gardening..
The beauty here is that life is a set of emergent patterns, rather than the components of which its made of, or the behaviour that arises from their interaction.
Neural Networks, Rebooted.
So. I started modelling a neural network in JavaScript.
Its not hard. Just an array of nodes, each containing another array of links to other nodes. With the added catch that each link to another node has a weight between 0 and 1, which determines if the onward connection should be fired during a chain-reaction event. My first commit was 100 lines long. 60 if you remove comments and whitespacing.
Since I was trying to accurately model the biological system in our own brains (rather than a mathematical abstraction), I noticed my own gut telling me to add a slight delay between firing neurons. It seems natural really, it generally takes a whole millisecond to fire off the next neuron inside our brains, so the signal is never going to travel all the way across the brain instantly.
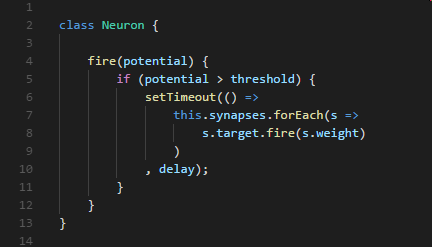
This solved my problem rather neatly. I had several input streams from each sensor that needed to be integrated, and I needed something that could be trained on a particular input, while taking into account all the other inputs, or even a changing set of inputs. Something that could behave more like a normal brain and create an intricately timed set of reactions to an input (think of the muscles involved in picking up your phone), or integrate an input with itself (by having a signal that loops around).
I noticed my own gut telling me to add a slight delay between firing neurons. It seems natural really … the signal its never going to travel all the way across the brain instantly.
I also researched the interleaving of signal patterns in real neurons and came up with a spiking model that combined multiple upstream signals before firing a signal downstream.
Chaos and the game of life
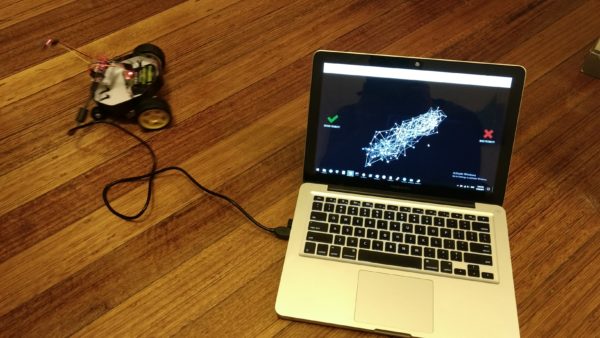
This was all confusing as hell so I needed to visualize my network in order to understand what it was doing.
Thankfully JavaScript is a great language for that, there are tons of libraries out there for visualization and thanks to V8 and the NodeJS ecosystem you can run the same code on the browser as you would a command line executable. I used browserify to require my modules on a browser page and viz.js to perform visualizations using HTML5 <canvas/>.
The result was intriguing. I noticed all sorts of patterns, travelling waves, and oscillations taking place when a neuron was fired. It was utter chaos but it was also mesmerizing.
The result was intriguing. It was utter chaos, but it was also mesmerizing.
I felt I was on to something. After all electrical wave patterns are an inherent part of the human brain. So why do prevailing models of neural networks ignore them?
It turns out that I was building something called a Spiking Neural Network, the so-called 3rd generation of neural networks that more closely emulate their biological cousins, and which encode information in patterns of signals.
I tried different network shapes, a ball, a sausage and a dounught. All produced interesting variations. Jonathan, a colleague at work, said it reminded him of Conway’s Game of Life. I had to agree with him.
Now in 3D
It took some extra modelling to come up with a good visualization that would let me understand what was going on, my original 2D library could only visualize around 300 neurons before falling over, using 3D I could increase that to a few thousands.
I called the newly born library botbrains, and used a combination of a 3D Force Graph in WebGL for rendering the network, WebSockets for client/server interaction, and node.js for running the neural network on the back-end so it could integrate via USB Serial to the Arduino microcontroller running my motors and collecting data from sensors.
Machine Learning, for signal patterns.
Next challenge came from learning. I had to find a way to make the robot marginally smarter over time. After all its not very useful if your robot keeps bumping into the wall.
Thankfully, plenty of people had already worked out the answer. Or rather two answers, really. You either use reinforcement or back-propagation. Both good approaches, but since my network was asynchronous, working out the loss-function for back-propagation was a real headache (I had to backtrack in time taking into account competing signals) and besides I didn’t want to depend on layers as I wanted all the richness of signal patterns that different shapes of neural network could create.
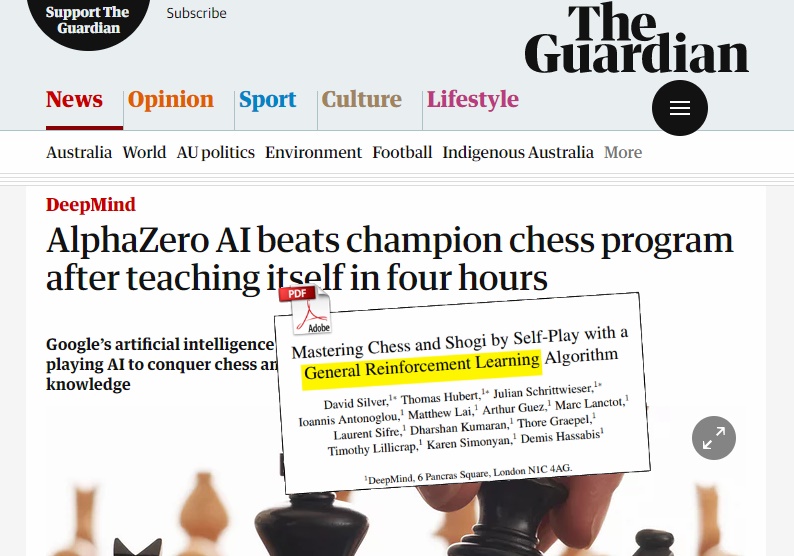
The biological answer here was reinforcement, aka “Long Term Potentiation“. So I went with that. Later I found out that AlphaZero, the current AI chess champion used reinforcement too so that made me feel much better about my choice.
So, how to implement reinforcement learning?
Well, its not so hard really, though it took several iterations. The basic premise was to reinforce synapses that fired recently whenever the robot does something good (like avoid an obstacle), and to weaken synapses that fired recently whenever something bad happens.
Although pretty close, this wasn’t enough on its own, as the network would either overload or fail to connect altogether, so after a fair bit of testing I worked out that the most elegant model was to maintain the network weight constant by spreading out any positive or negative changes over the remaining unused synapses, so effectively during learning I would strengthen ‘successful’ connections while weakening all the other ones, reversing the process for negative reinforcement.
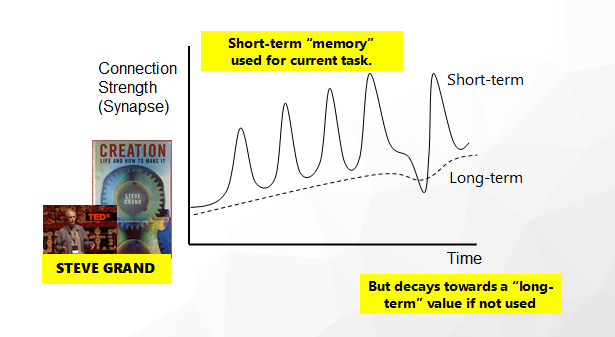
I also added a tendency for synapse weights to decay towards their starting weight with each learning iteration, as well as strengthening unused synapses randomly whenever negative reinforcement is applied (ie, sometimes the solution to the problem can be found by using neural pathways that have never been used before).
 Long-term memory was a problem, and still is to this day though its getting better.
I added the ability for synapses to contain both ‘short-term’ and ‘long-term’ weights, both of which are influenced by the other. I pinched this idea from Steve Grand, which I found an incredibly simple and powerful solution to long-term memory.
Now all I had to do was to plug my robot into it.


 If all goes well, this should have created a bunch of files and folders (ie a project structure) within your ‘magnetometer’ project folder, you should be able to see them using a file explorer:


 This will create an android project, next we will build the APK file that can be used to run the magnetometer app on your phone.


 You will then need to run the following command on your ‘magnetometer’ folder to ‘prepare’ the files (it will copy the ‘index.html’ to the XCode build folder).
 Make sure you are signed in as an apple developer. Joining costs US$99. You cannot drop an app on your iOS device without one of these: